
ROUTES BEFORE FIXTURES
Design Basement Plumbing From the Drainage System Out
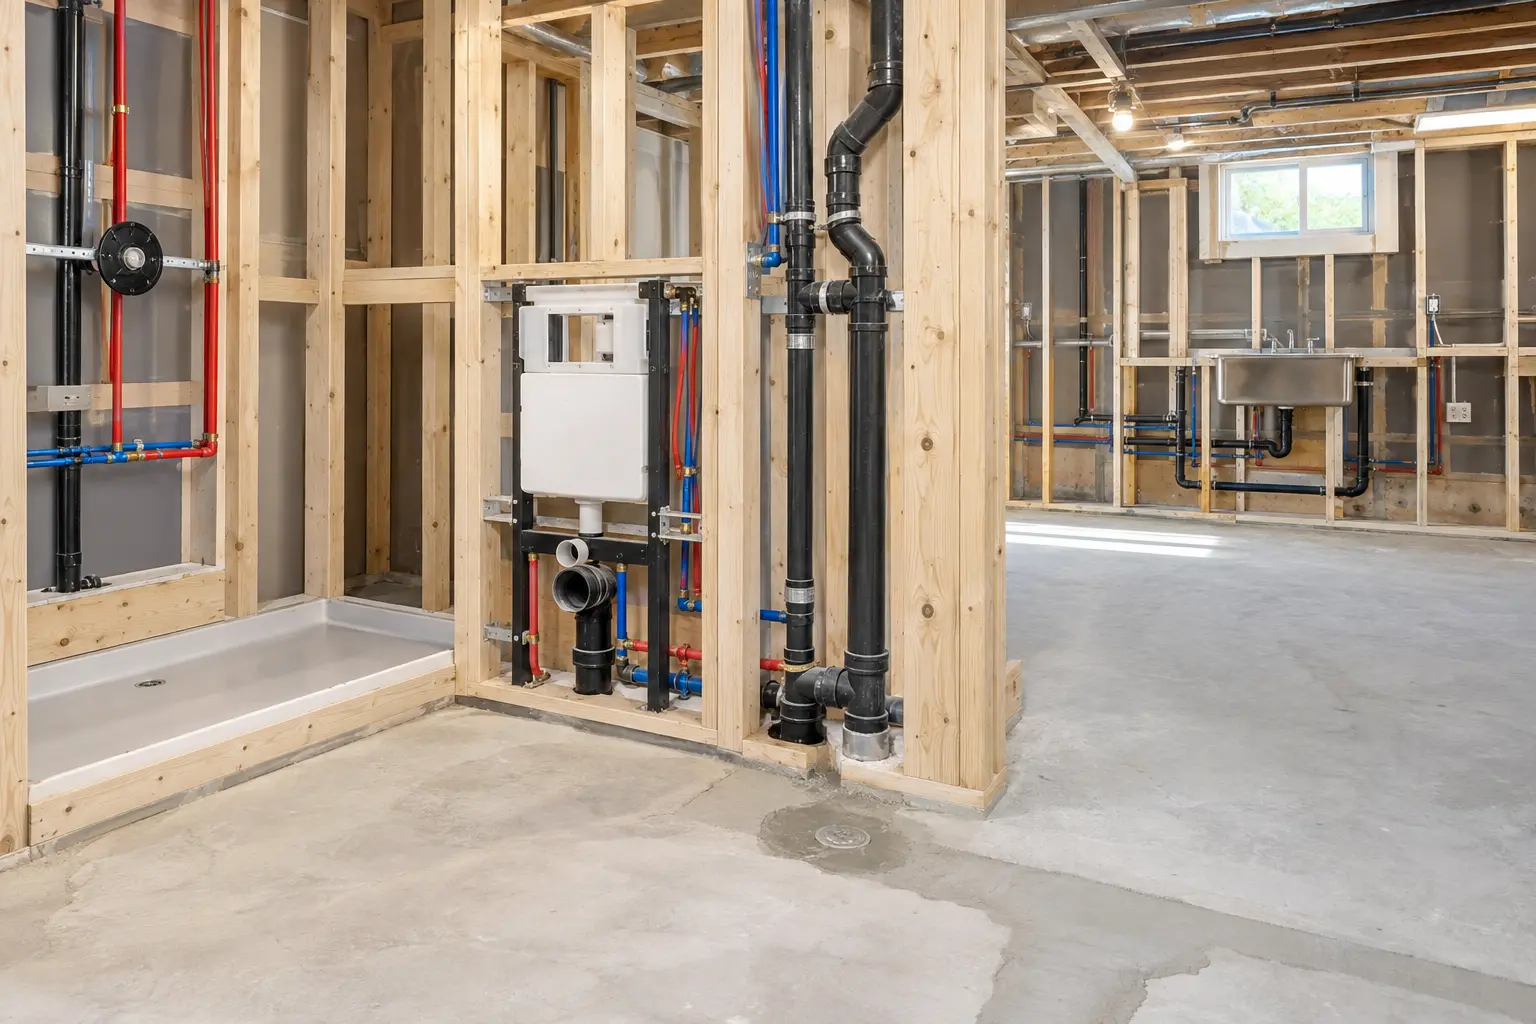
Kitchens and bathrooms are often drawn as furniture blocks, but their feasibility depends on gravity drainage, venting, water supply, slab conditions and service capacity. Before choosing finishes, trace where the existing drains, stack, water entry and shutoffs are located and confirm what can be accessed.
A compact wet core can reduce excavation and long horizontal runs, yet it should not compromise circulation or equipment access. The shortest route is not always the best route if it crosses a footing, conflicts with structure or leaves critical valves behind permanent cabinetry.
Below the slab
Locate drains and understand slab depth, slope, cleanouts and any groundwater considerations before cutting. Plan testing and inspection while the work remains open.
Inside the walls
Coordinate supply, drainage and venting with studs, insulation, fire assemblies, cabinets and accessories. Avoid unreviewed drilling or notching of structure.
At the fixtures
Choose serviceable fixtures, reliable shutoffs and practical clearances. Waterproofing, exhaust and electrical requirements must align with the final room plan.
KITCHEN COORDINATION
Make the Appliance Plan a Technical Document
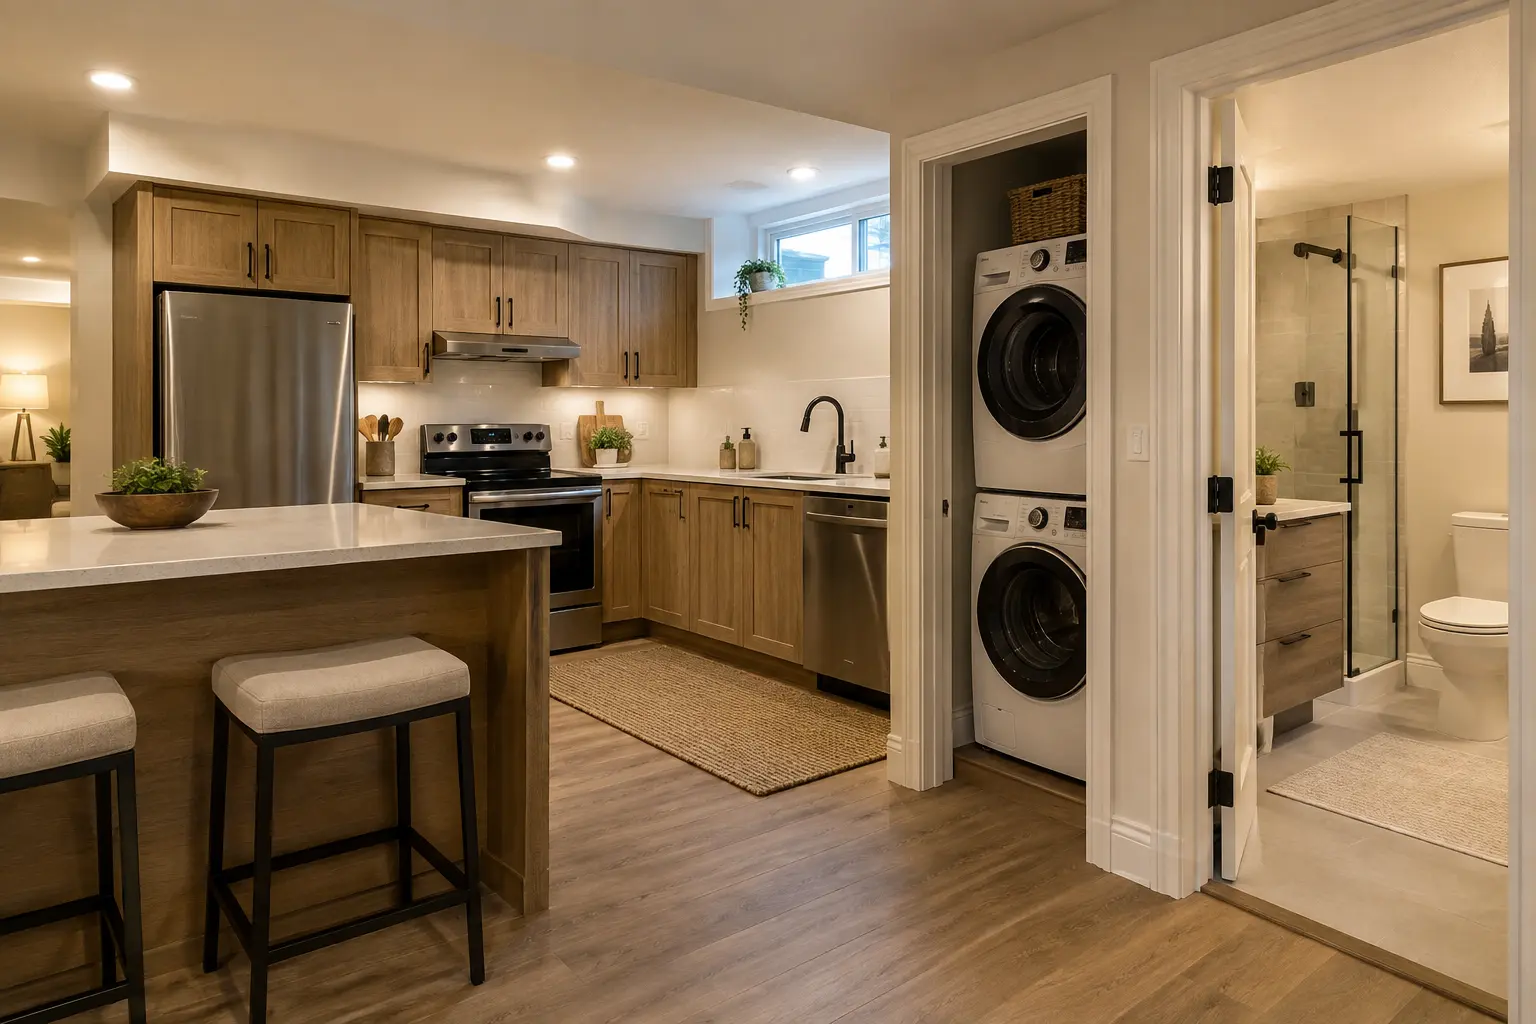
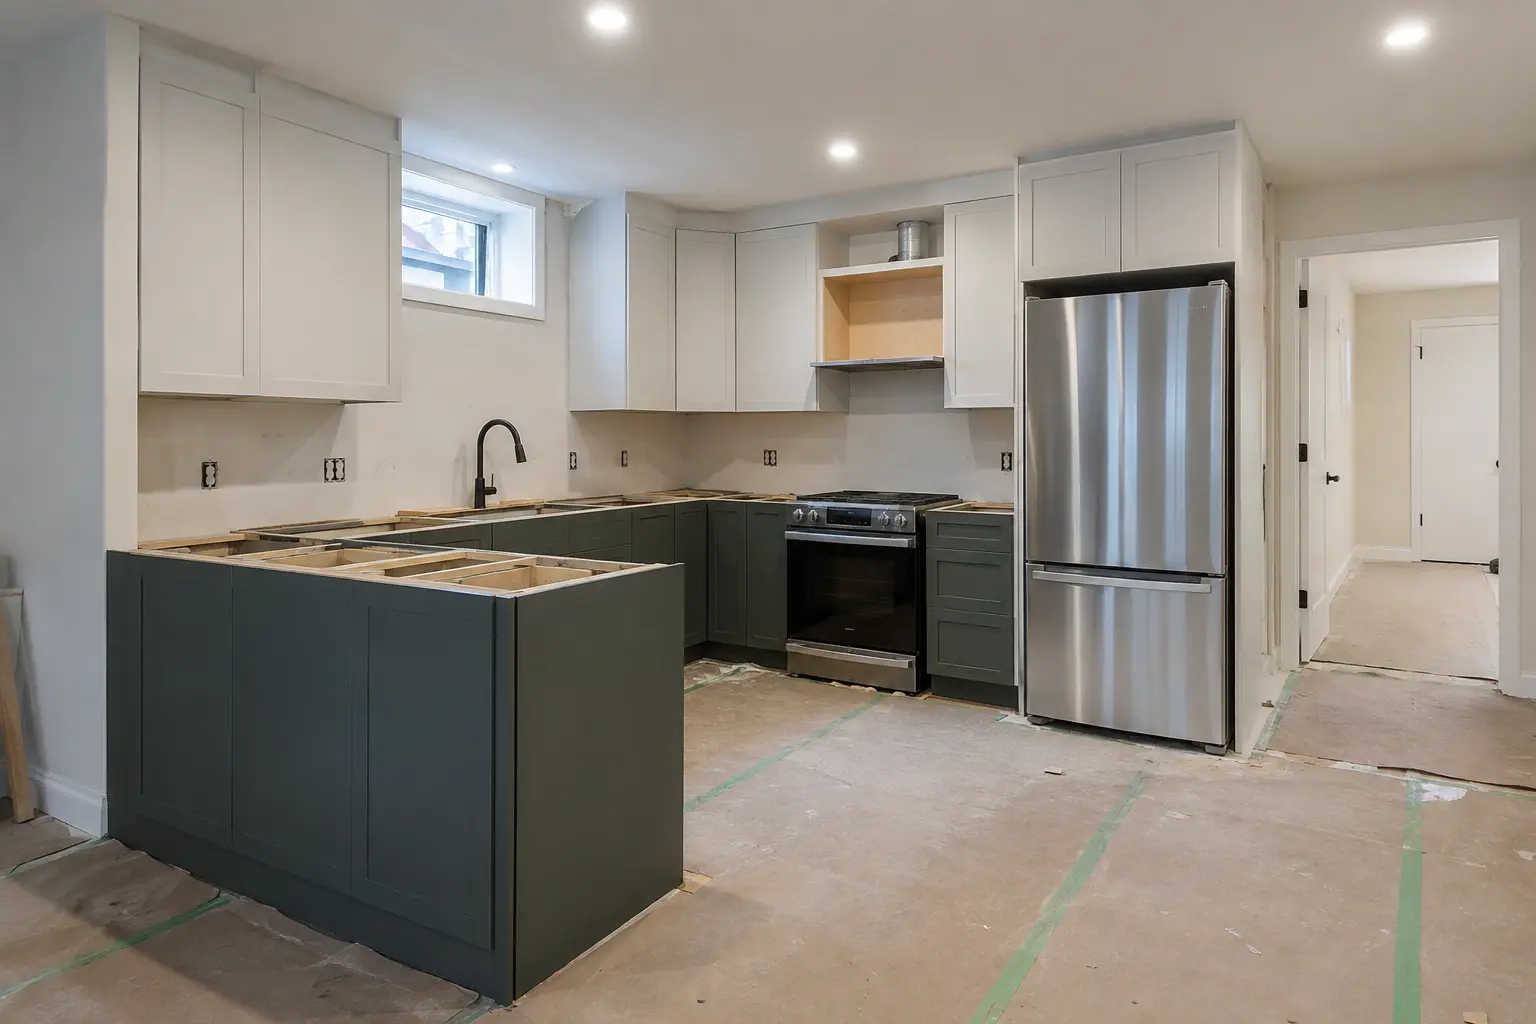
Confirm the actual refrigerator, range, dishwasher, sink, hood and laundry requirements before rough-in. Appliance dimensions, door swings, electrical demand, water connections and exhaust paths can change the cabinet layout and service plan. A placeholder “standard appliance” is rarely precise enough.
Plan shutoffs and cleanouts where they can be reached without removing stone counters or fixed panels. Protect water lines from vulnerable exterior-wall locations. Coordinate the sink and dishwasher with the drainage and vent strategy rather than routing around completed framing.
If laundry is included, address drain protection, supply shutoffs, dryer ventilation or condensing equipment, noise and access for replacement. Stacking appliances saves area but can complicate service clearance and ceiling coordination.
Kitchen and laundry checklist
- Final appliance specifications and electrical loads
- Sink, dishwasher and refrigerator water connections
- Range or cooking-appliance ventilation approach
- Accessible shutoffs, traps and cleanouts
- Cabinet clearances and countertop support
- Laundry drainage, supply and leak-control strategy
- Service access after all finishes are installed
BATHROOM DURABILITY
Treat Water Control as a Complete Assembly
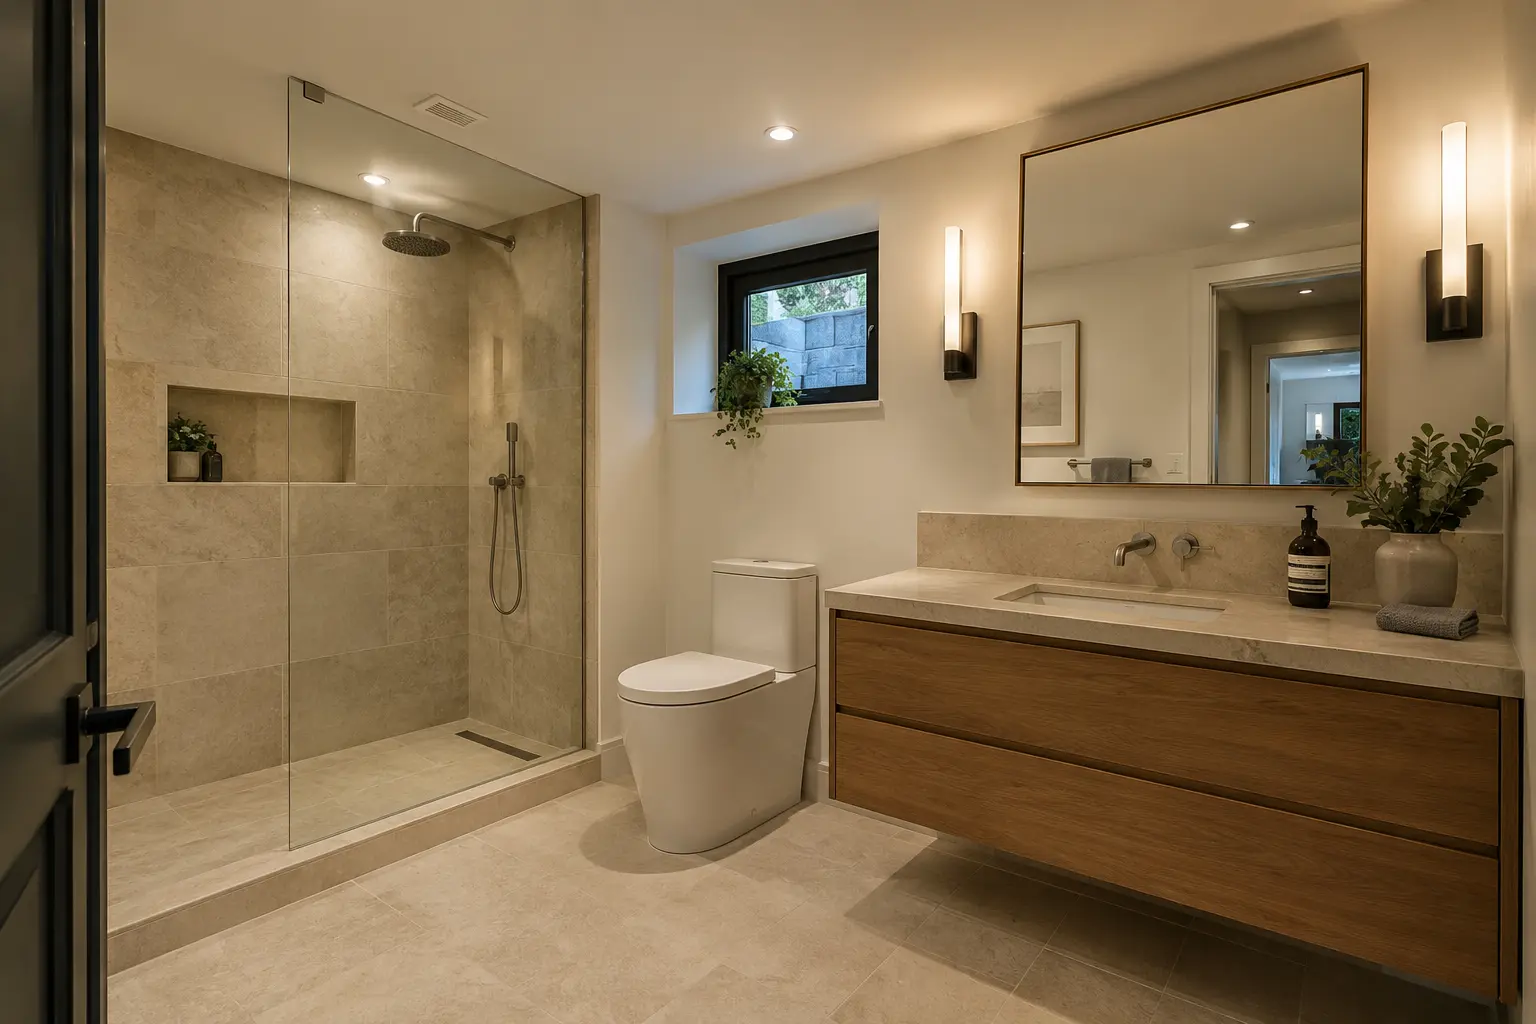
A bathroom combines plumbing, ventilation, electricity, waterproofing and finish tolerances in a small room. Define the shower or tub system, floor transitions, drain type and penetrations before tile work begins. Mixing components without a compatible detail can create hidden weak points.
Mechanical exhaust should have a suitable route to the exterior and should be coordinated with ceiling framing and the building envelope. The door undercut, heat supply and room layout affect comfort and drying. Where a pump or backwater-related device is contemplated, understand power, alarms, maintenance and failure consequences.
Use photographs and inspection records to document concealed rough-in and waterproofing. Pressure or drainage testing should occur at the appropriate stage. After finishes, test every fixture, fill and drain the basins, check joints and verify the fan operates effectively.
Existing service capacity
Adding fixtures can expose limits in the water service, drainage, venting or hot-water system. A qualified review should distinguish between what physically connects and what can reliably support the proposed use. If upgrades are required, include them in the drawings, budget and construction sequence instead of treating them as an allowance discovered late.
See basement electrical planning for kitchen and bathroom circuit coordination and inspection closeout for record-keeping.
ANSWER-FIRST SUMMARY
When Should Basement Plumbing Be Planned?
Plan plumbing after an existing-condition survey but before framing and slab work. The fixture layout, drain and vent routes, water capacity, structural constraints, cabinetry and inspection sequence should be coordinated as one scope. This prevents a visually attractive plan from depending on impractical or unreviewed service routes.
Pricing should identify excavation, disposal, piping, valves, fixtures, testing, inspections, slab repair, waterproofing and finish restoration. Clear inclusions make quotations more comparable and help the owner understand which selections still carry allowances.
QUESTIONS HOMEOWNERS ASK
Frequently Asked Questions
Sometimes shared routes are practical, but fixture loads, venting, pipe sizes, slopes, access and the existing service condition must be assessed for the proposed work.
No. Confirm the fixture plan, drainage route, structural conditions and permit requirements before committing to slab removal or excavation.
Distance from suitable drains, slab depth, venting, water-service changes, pumps, waterproofing, fixture choices and restoration can all affect cost.
Required rough-in work normally needs to remain visible at the applicable inspection stage. Coordinate the sequence with the permit and responsible trades.
Use appropriately qualified and licensed professionals and trades for the scope. Permit and inspection responsibilities should be clear in writing.
ROUGH-IN TO HANDOVER
Protect the Plumbing Record at Every Stage
Photograph below-slab routes with measurements to fixed walls before concrete is restored. Record cleanouts, valves and any pump or backwater-related equipment. During wall rough-in, capture vent and supply routing before insulation or board conceals it. These photographs support future maintenance but do not replace inspections.
At fixture installation, use the specified connections and provide access where the product requires it. Test supply and drainage under realistic use: fill basins, operate adjacent fixtures, run laundry and observe joints. Verify hot-water delivery and exhaust operation without making unsubstantiated performance promises.
Handover items for wet rooms
- Fixture and appliance manuals
- Locations of suite and fixture shutoffs
- Cleanout and pump access instructions
- Waterproofing product records where applicable
- Electrical and plumbing inspection documentation
- Care requirements for grout, sealants and filters
Explain what should never be stored in front of a valve, cleanout or pump. Serviceability is part of a successful finished room.
Coordinate Selection, Rough-In and Finish Tolerances
Plumbing fixtures vary in connection location, carrier requirements, flow, clearances and mounting. Finalize technical specifications before walls and cabinets lock in the rough-in. For tile showers and wall-mounted components, coordinate framing and backing as well as water connections.
Cabinet shop drawings should identify sink, dishwasher, refrigerator, range and laundry services. Compare them with the plumbing and electrical plans. Resolve discrepancies before fabrication; site-cut cabinets and relocated drains usually cost more and produce poorer access.
Quality-control sequence
- Verify fixture and appliance specifications.
- Lay out below-slab and wall services from fixed dimensions.
- Complete required tests and inspections while open.
- Photograph routes and repair the slab or assemblies.
- Check finished dimensions before cabinets and tile.
- Install, operate and observe every fixture under use.
If water pressure, drainage speed or hot-water delivery is poor, diagnose the system instead of adjusting finish work around the symptom. Record any commissioning changes and explain them to the owner.
Finally, provide a simple response plan for leaks: which shutoff controls the suite, where sensitive equipment is located and whom to call. Fast, informed action can limit damage in a finished lower level.
Where a fixture relies on a pump, powered valve or alarm, document power loss behaviour, testing intervals and replacement access. The owner should know the consequence of a failure and the first safe action to take. Keep warranties, model numbers and service contacts with the final plumbing record.
Coordinate With Finish Elevations
Wall elevations should show faucets, outlets, mirrors, lights, cabinets, tile edges and accessories together. This prevents a technically connected fixture from landing off-centre, behind a drawer or too close to a finish transition. Confirm mounting heights with the intended users and product instructions.
Before tile or counters are installed, photograph backing and verify penetrations. Finish tolerances are small, so resolve discrepancies while framing and rough-in can still be adjusted cleanly.
REQUEST AN ASSESSMENT
Coordinate Basement Plumbing and Wet Rooms
Share the current condition, the result you want and any drawings, permits or inspection information already available.
Project requirements depend on the property, existing conditions and proposed scope.
Discuss Your Basement
Tell us what exists today and what you want the lower level to become.
Please return shortly to request a basement assessment.